A User’s Guide to the Common Application
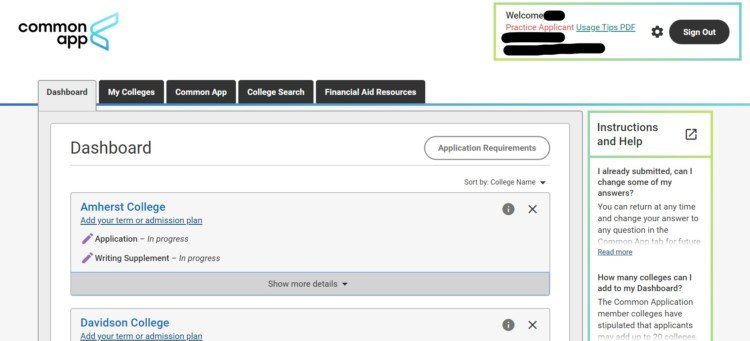
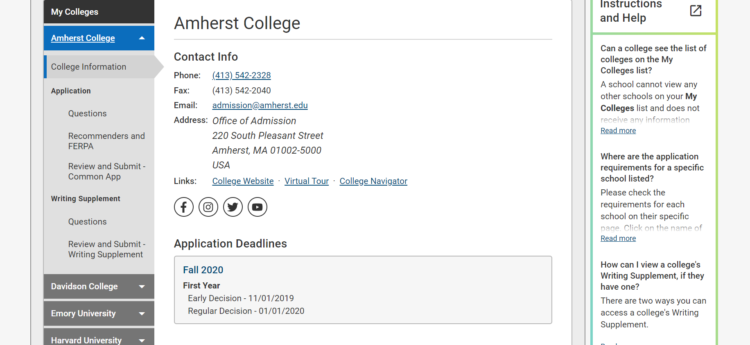
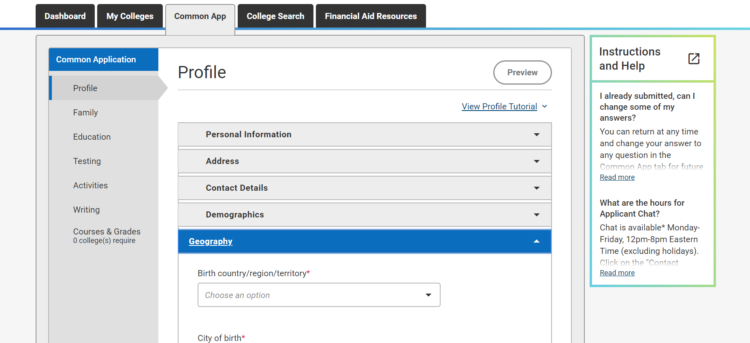
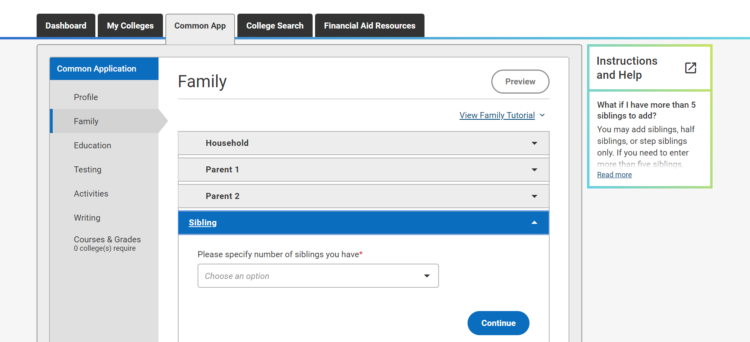
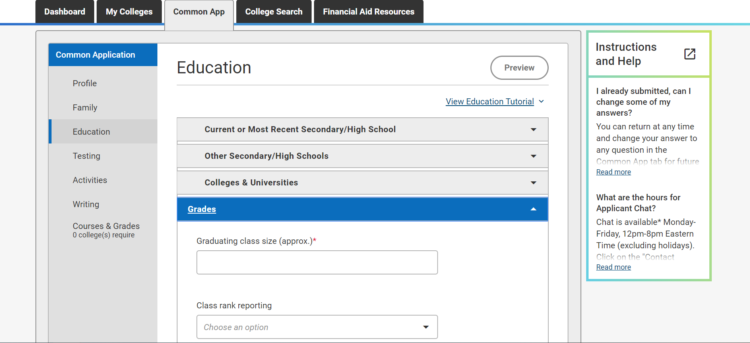
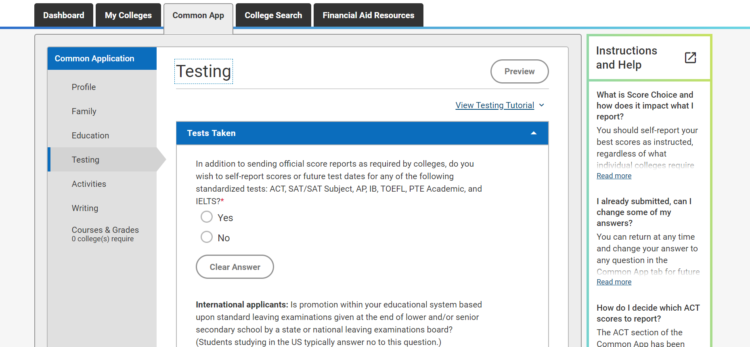
As most students will agree, college applications take a lot of work to complete. The sheer volume of information you’re expected to provide can be very overwhelming, especially when multiplied by the 7, 10, or even 15 schools you’re planning to apply to. Much of this information is also extremely repetitive. Every college will want to know where you live, who your parents are, and how well you did in high school. It’s likely that you’ll send the same recommendations to every college you apply to, and even essay questions may be similar from school to school. This is where the Common Application comes in. The Common App originally came into being in 1975, when 15 private colleges began considering the repetitiveness of college application procedures. In the days of paper applications, filling out separate forms for each college by hand made applying to more than a few colleges a huge amount of work. The original Common App schools developed a single application form to be used by all member schools. This application could be sent to a number of different schools, thus drastically reducing the workload for college applicants. The Common App has continued to gain member schools over the years, and as of the 2019-2020 school year, it is now accepted by over 800 colleges and universities. The Common App is now completed entirely online. Your basic application information is automatically copied to each member school with whom you choose to share it, meaning you only have to enter those details once. While many colleges choose to include a “supplement” with a number of application questions or writing prompts specific to that college, the submission process still takes place through the Common App. Here at CollegeVine, we’re committed to helping students and their families understand the college application process. To that end, we present this brief user guide to the Common App. While this post will not cover every detail of the application process, it’s intended to provide you with an accessible, practical framework to help you understand the Common App, its online interface, and its main requirements. Ready? Let’s dive in! To get started using the Common App, you’ll need to create a Common App account. Once your account is set up, you can monitor your application progress using the Dashboard, add schools to your list under My Colleges, fill out the actual application part of the Common App, and look up colleges through College Search. We’ll go over each of these sections of your account below. To create an account, start on the Common App website. In the upper right corner of the main page, you’ll see white text that says “Create an Account.” Click on this button. A menu will appear that asks you to identify yourself as either a first-year applicant, a transfer student, an educational professional, or a parent. Select the appropriate choice and then follow the prompts to create a password and fill in your contact information. Make sure to write down your password for future reference. Once your account is created, you’ll be able to log back into it using your email address and password. Just head back to the Common App homepage and click on “Log In” in the upper right corner, choose the “Student” option when prompted, and enter your login information. When you log into your Common App account, the first thing you see will be your Dashboard. You can also access your Dashboard at any time by clicking on the Dashboard tab at the top of the screen. To use the Dashboard, you’ll need to add the colleges you intend to apply to. You’ll do this through the College Search feature, which allows you to search by location or name. If your college list is not yet finalized, you might use the additional filters to browse colleges according to state, distance from your home, testing policy, or application deadline. Add to your Dashboard the colleges you intend to apply to by clicking on the blue + sign next to the college name. Once you add a college to your list, it will appear on your Dashboard along with an overview of your application progress and tasks to be completed. Your Dashboard serves to give you a quick glimpse of the requirements of the various colleges you’re planning to apply to. In our example below, the student is applying to the schools you see listed on the left side of the page — Amherst College, Davidson College, and so on. Clicking on “show more details” provides you with a quick way to check what each school requires. As you can see in this screenshot, there is an “Instructions and Help” box on the right side of the page. This box will appear throughout the Common App, but the frequently asked questions will change depending on what part of the site you’re looking at. If you have a question that isn’t shown, simply click where it says “Instructions and Help” to access more assistance. The My Colleges section of the Common App allows you to access information about each of your chosen colleges’ admissions requirements. You can get to the My Colleges section at any time by clicking on the My Colleges tab at the top of the screen. As you can see from this screenshot, our student’s My Colleges page is showing more detailed information for the first college on the student’s list — in this case, Amherst College. The other colleges the student is applying to are listed along the left side of the page. In order to show information for another college on your list, you’ll simply click the college’s name and a drop down menu will appear with details in the window to the right. Your own My Colleges page will not show any colleges until you add some to your list, as described in the Dashboard section above. Once you add schools, the My Colleges page will show the schools you have selected. The My Colleges page is also where you’ll access the parts of your college applications that are specific to each individual college. As you can see in the screenshot above, under the college’s name on the left side, you’ll see a number of items, including a heading “Questions” which will bring you to any supplemental materials required by that college. As an example, below is a screenshot of the supplement for Amherst College. Clicking on the word “Questions” under “Writing Supplement” will take you to the following screen, where you’re provided with the prompts and instructions on how to complete them. Every school’s supplement is different, and you must read the instructions for each carefully. Some schools don’t have a separate “Writing” tab and may have other headings. Make sure you take a careful look at any and all headings in this section to determine if there are more supplementary questions for you to answer — they might not all be immediately visible. Reviewing the My Colleges tab is a good way to keep track of admissions information for the various colleges you’re interested in, but it doesn’t cover everything in terms of that school’s admissions practices, and it’s not a substitute for more in-depth research. Clicking on the blue link that says “College Website” in the “Links” section of your school’s information will take you to that school’s own admissions website, where you can find out more about their policies. The Common App section is where you’ll actually fill out the substance of your college applications. You can access it at any time by clicking on the Common App tab at the top of the screen. A menu will appear on the left side of your screen with headers that include things like “Profile” and “Family”. For each of these sections, you’ll need to provide answers to a number of specific questions. Some of these questions will be in multiple-choice format, and you’ll have to choose one option (or more, if specified). Others will ask you to enter certain small items of data, such as a name or phone number. Still more will require you to write out a longer answer, up to and including the personal essay, which we’ll cover in further depth in other blog posts. If you’re unsure about how to answer some of these questions, you can visit the “Instructions and Help” section of the Common App website. Your guidance counselor or another school official may also be able to help. These are the sections of your Common Application: Profile: This section is where you’ll enter more detailed information about yourself. It includes sections like name, address, and demographics. Scroll down to see each section header, and click on the downward pointing triangle to open each menu and complete each field. The Profile section also includes the Common App’s fee waiver request form, which you can learn more about on the CollegeVine blog in our post How to Receive a Common App Fee Waiver. Family: This section is where you’ll answer questions about your household, your parents, and your siblings. Again, you’ll scroll down to see each section header, and click on the downward pointing triangle to open each menu and complete each field. We at CollegeVine have covered this topic in greater detail in the blog post Why Does the Common Application Ask Where my Parents Went to College? Education: This section is where you’ll answer questions regarding your educational experiences, like what school(s) you’ve attended and your scholastic achievements. You’ll also list all the courses you are taking now or have taken in your most recent year of schooling. Testing: This section is where you’ll tell the Common App whether you would like to self-report your standardized test scores. If you elect to self-report, you’ll be given the option to tell the Common App which tests you’d like to report your scores for, and then to enter your scores for those tests. Activities: You can read more about this section by reading the CollegeVine blog post How to Fill Out the Common App Activities Section. Writing: This section is where you’ll answer questions that require longer written responses, starting with your personal essay. Under the “Personal Essay” section, you’ll find a list of topics to choose from, and a box in which to copy and paste your essay text. (We strongly recommend that you compose your essay first in a Word document or other format outside of the Common App website.) Check out our post How to Write the Common Application Essays 2019-2020 (With Examples) for more information about writing a standout personal essay. Under the “Disciplinary History” section, you’ll be asked if you have been found responsible for a disciplinary infraction either at school or in the community, and you are given an opportunity to address or explain what happened. Finally, under “Additional Information,” you can include information on any special circumstances which might be relevant to your application and are not addressed elsewhere in the Common App. As you can see, there’s a lot to be filled out on the Common App, and you’ll most likely go back and change some of your responses more than once. Once you’ve completed the Common App and your individual colleges’ supplements to your satisfaction, it’s time to submit your application. Before you submit, you’ll need to thoroughly go over your application to make sure that you’ve answered all the questions and filled in all the blanks. The Common App will notify you if you’ve left any required questions unanswered, but it’s best to look over everything yourself as well. Leave yourself time for this step. In order to start the submission process, go to your My Colleges section. Let’s say that you’ve completed all the necessary fields under the Common App section, as well as the writing supplement required for Amherst College. Everything is in place for you to actually submit your application to Amherst through the Common App portal. When you reach this point, you’ll click “Review and Submit — Common App” under the “Application” heading. The following steps will only become visible to you once you’ve completed your application; if anything is missing, you won’t be able to access this process at all. The first step in the submission process will involve reviewing your application yet again. This time, instead of clicking all the individual tabs, you’ll simply view a PDF print preview of your entire application, set up as one document. Take this opportunity to make sure there are no errors — it’ll be your last opportunity to do so. It may be helpful to actually print the PDF and review it on paper. Sometimes seeing a physical copy can reveal typos or other mistakes you missed when reviewing it on a screen. When you’ve completely reviewed it and are satisfied with your application, hit the red button that says “Continue.” At this point, the Common App website will reroute you to that particular college’s payment page. Here, you’ll submit your application fee directly to the college. (If you have requested a Common App fee waiver, you will not be required to make a payment at this point.) Once your application fee is submitted, you’ll sign and date your application. Then comes the big moment: finally hitting “Submit” on your Common App. For most schools, submitting the Common App is not quite the end of the process. You’ll also need to submit your school-specific supplement, and you cannot do so until your Common App itself is submitted. To submit your supplement, you’ll click on “Review and Submit Writing Supplement” under the “Writing Supplement” heading. This will lead you through a process similar to the one you went through in order to submit your Common App. Follow the instructions given by your particular school. When you finish the process of submitting your writing supplement, return to your Dashboard within your Common App account. Look for the school to which you just submitted an application. If a green check mark has appeared across from that school’s name under the “Application” column, congratulations! You just applied to college! Remember, submitting the Common App is not the only thing you need to do in order to apply to your chosen colleges. While your counselor and recommenders will be able to submit their documents through the online system, you’ll have to make sure that your official test scores are sent directly to your colleges by the agencies that administer those tests. For more about this process, check out our post What You Need to Know About Submitting ACT & SAT Scores to Colleges. You’ll need to repeat the submission process for each college you wish to apply to. This is admittedly a bit repetitive, especially if you’re applying to a large number of schools, but it’s still better than filling out all those separate forms individually. We at CollegeVine realize that you may still have many questions about the Common App, and we’ll address some of those in future posts. For the moment, here are a few questions about the Common App that we frequently encounter. “How do I download a PDF of my application?” Once your application is complete and you begin the process of submitting it to a college, you’ll be given the opportunity to review your application in PDF “print preview” form. Many students want to hold onto a physical and/or an electronic copy of that PDF, and that’s a smart thing to do; technical glitches are always possible when using an online application system. Downloading a PDF of your completed application is usually quite simple, but the details and screen appearance of the process will vary based on technical details like what type of computer and what Internet browser you’re using. If you’re having a hard time with your PDF, you might try opening your Common App in a different browser. Generally speaking, when you view the PDF preview of your application, you will be able to save a copy through the program that you used for opening it. In most cases, you will be able to select File>Save As, and then specify what you would like to name this document, as well as where you’d like to save it to on your computer. Keep in mind that your saved or printed preview of your Common App is not a valid application—it is simply a preview of the online version. You cannot print your application PDF and mail it to the school as a means of applying. You may only submit it officially online, through the Common App portal. “How do I sign my FERPA waiver?” Your FERPA waiver basically governs whether you’ll be allowed to view the recommendations you receive from your guidance counselor and teachers after you enroll in college. Signing it waives your right to review the recommendations and generally makes them more valid, as it ensures that your recommender is submitting an honest, unbiased assessment. In order to sign your FERPA waiver, first go to your My Colleges section. Click on the first college on your list, and then click on “Recommenders and FERPA” under the name of the college. To access your FERPA waiver, click on the button that says “Release Authorization.” A box will pop up with explanatory text. Click the checkbox to certify that you have read and understood the explanation. Then click on the button that says “Continue.” Then, select one of the options to state whether you waive or do not waive your right to review your recommendations and supporting documents. Click the next checkbox to certify that you understand that your selection here cannot be changed. (Don’t do this until you’re sure what choice you want to make — you can hit “Cancel” if you want to give it some more thought first.) Finally, type your name in the Signature box and the current date in the Date box. Click “Save” to finish signing your FERPA waiver. The majority of students choose to waive their FERPA rights. It’s not required, but choosing not to waive your rights may make a negative impression on the people who will evaluate your application. Some teachers and counselors may be unwilling to provide a recommendation for you at all unless you do waive your FERPA rights. “What is the maximum number of schools I can add to the Common App?” You can add a maximum of 20 schools to your list of schools within the Common App. This is a restriction set by the Common App’s member schools, and there are no exceptions to this rule. If you change your mind about your list of schools during the application process, you can delete a school from your list using the Dashboard — just click on the gray X to the right of the school name to remove it. If you’ve already submitted your application and/or your school supplement to that school, you are not permitted to remove it from your list. This is a lot of information to digest in one sitting. Don’t worry too much right now — you can always come back to this post and the others on the CollegeVine blog for guidance. The prospect of answering all of these questions may seem pretty daunting at this point, but there are instructions and resources available to help you manage the process along the way. You can also take a look at past posts on our blog, which cover everything from choosing colleges to application strategies to financial aid. Best of luck in finding a college that’s a great fit for you! You may also like: How to Write the Common App Essays 2019-2020 How to Fill Out the Common App Activities Section Want help with your college essays to improve your admissions chances? Sign up for your free CollegeVine account and get access to our essay guides and courses. You can also get your essay peer-reviewed and improve your own writing skills by reviewing other students’ essays.

Introducing the Common Application
Step 1: Creating and Logging into your Common App account

Step 2: Navigating the Dashboard

Step 3: Using the My Colleges Portal

Step 4: Filling Out the Common App
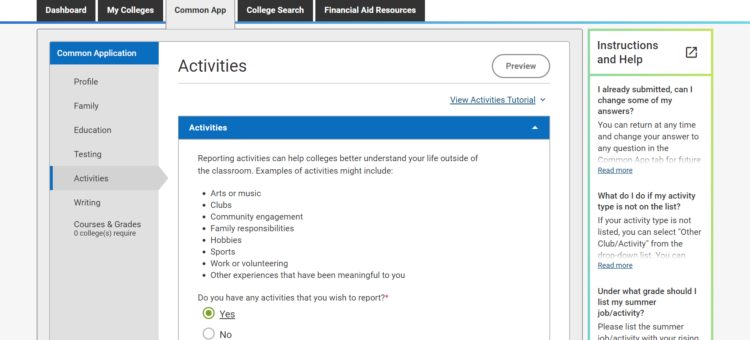 This section is where you’ll enter the activities in which you’ve participated as a high school student. You can add up to ten activities, and you’ll be asked a number of questions about each one, including when you participated in the activity, how much time per week you spent on it, and any notable accomplishments or leadership positions associated with that activity.
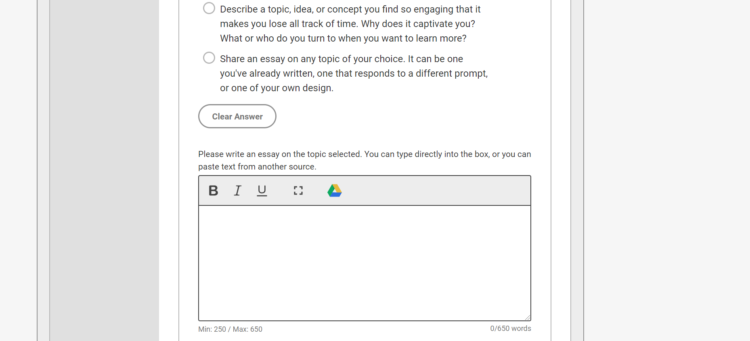
Step 5: Submitting the Common App
Step 6: Submitting Supplements
Step 6: Additional Tasks
Common App FAQs